Upgrading Sketchbook Project
My 2013 Sketchbook is now sailing across the sea to the Brooklyn Art Library at the Art House Co-op… Before I post the drawings, here’s a little post about the re-binding I subjected the book to before I got stuck into drawing.
Based on my first experience with the sketchbook sent out by the Art House Co-op, I decided it would be worthwhile replacing the rather flimsy paper with something more sturdy (at least thick enough to prevent pen & ink drawings from bleeding through to the next page)… The re-binding was quite straight forward – and it made a big difference to draw on the thicker paper :)
There are lots of ways to bind a book, this is a simple quick way to make a sketchbook. Just keep in mind that a book (depending on paper thickness) has a limit to how many pages it can manage on a single fold; for a larger (thicker) book, use multiple folds and stitch these individually before stitching them together and attaching to the spine.
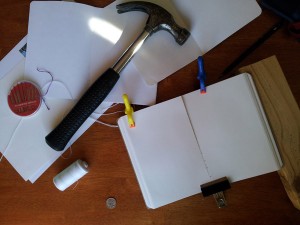
Bring out the tools …
- I used 2 large (roughly A1 size, probably a bit bigger) sheets of good drawing paper laid out on the floor for easy measuring and cutting.
- Before I started cutting, I measured the original paper size in the sketchbook (I did this a few times, to make sure ;)).
- After the pages were cut, I folded each one in half and put them all in a pile.
- To avoid the centre pages sticking out, I trimmed the outer edge with all pages folded together (otherwise the pages towards the middle end up ‘bigger’ as they don’t have as many pages to fold around).
- A 5 cent piece, a pencil and a pair of scissors were used to cut the rounded corners.
- I added the thicker cover page and clamped the ‘book’ open at the centre fold.
- Hammer and nail were used to make small holes down the spine in preparation for sewing.
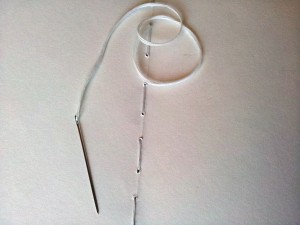
- Finally, I used needle & thread to sew the pages together down the centre spine:
Annette :)